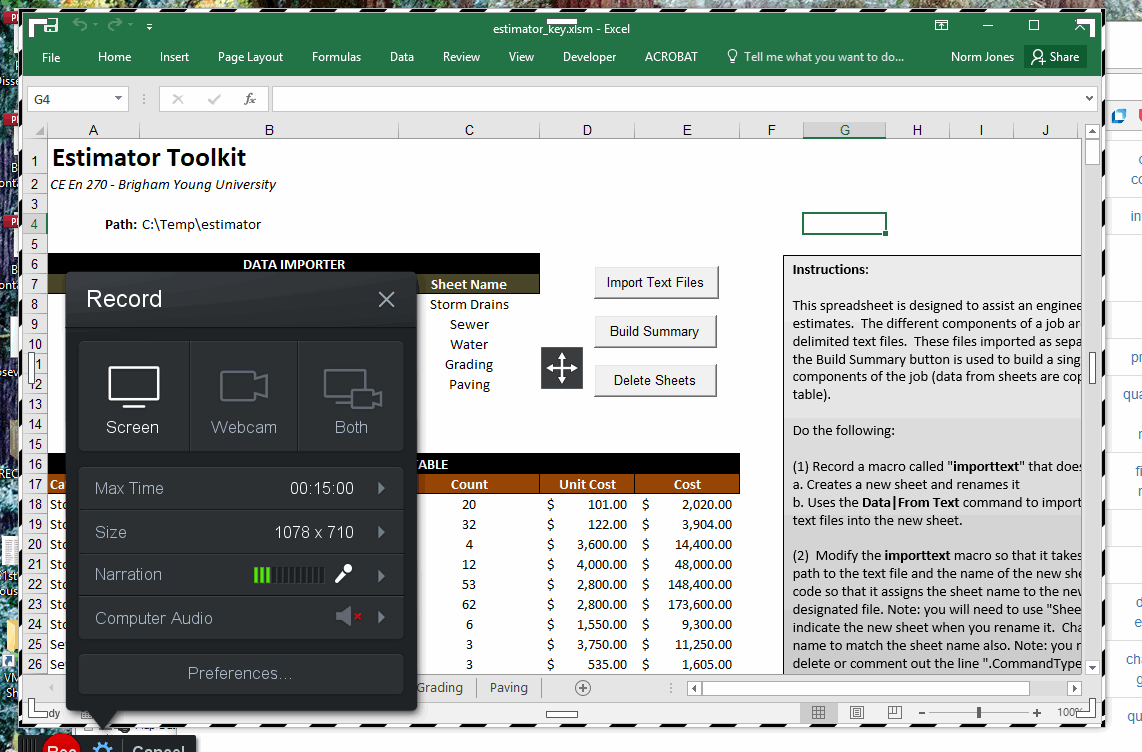
a) Launch the Excel file associated with your term project and resize the Excel window to the size you want to use in your demo. You should make it as big as you need and no bigger because a larger space will result in a larger video at the end.
Please use the following steps to create a term project video for your group. The video must be 5 minutes or less. You will simply screen capture one of your group members giving a short demo of your term project. You should introduce the project by describing what it does or the objective and then illustrate how it is used. To do this, you will need to use the screen recording software described below. The video should include voice narration, i.e., you should use your computers microphone to record your voice as you give the demo. When you are done, you will need to upload the resulting video to YouTube.
In order to complete the following steps, you will need to be on a computer that both has a microphone and has admin priviledges that allow you to install software. So you will not be able to do it in room 234 or the other CAEDM labs. You will need to do it on a laptop or home computer.
If you don't already have one, you will need to create a YouTube channel. YouTube is owned by Google, you will login to YouTube using your Google account. Then follow these instructions to create a channel:
https://support.google.com/youtube/answer/1646861?hl=en
Only one person in your group will need to do this.
For this step (and the next), you are free to use whatever screen capture software you like, but the instructions here are based on a free utility called Screencastomatic.
a) Go to the following URL:
https://screencast-o-matic.com/screen_recorder
b) Click on the Launch Recorder button. The first time you do this, it will need to install an extension to your browser. Follow the prompts to complete the installation.
c) Once the installation is complete, the recorder should launch. If not, click on the Launch Recorder button again.
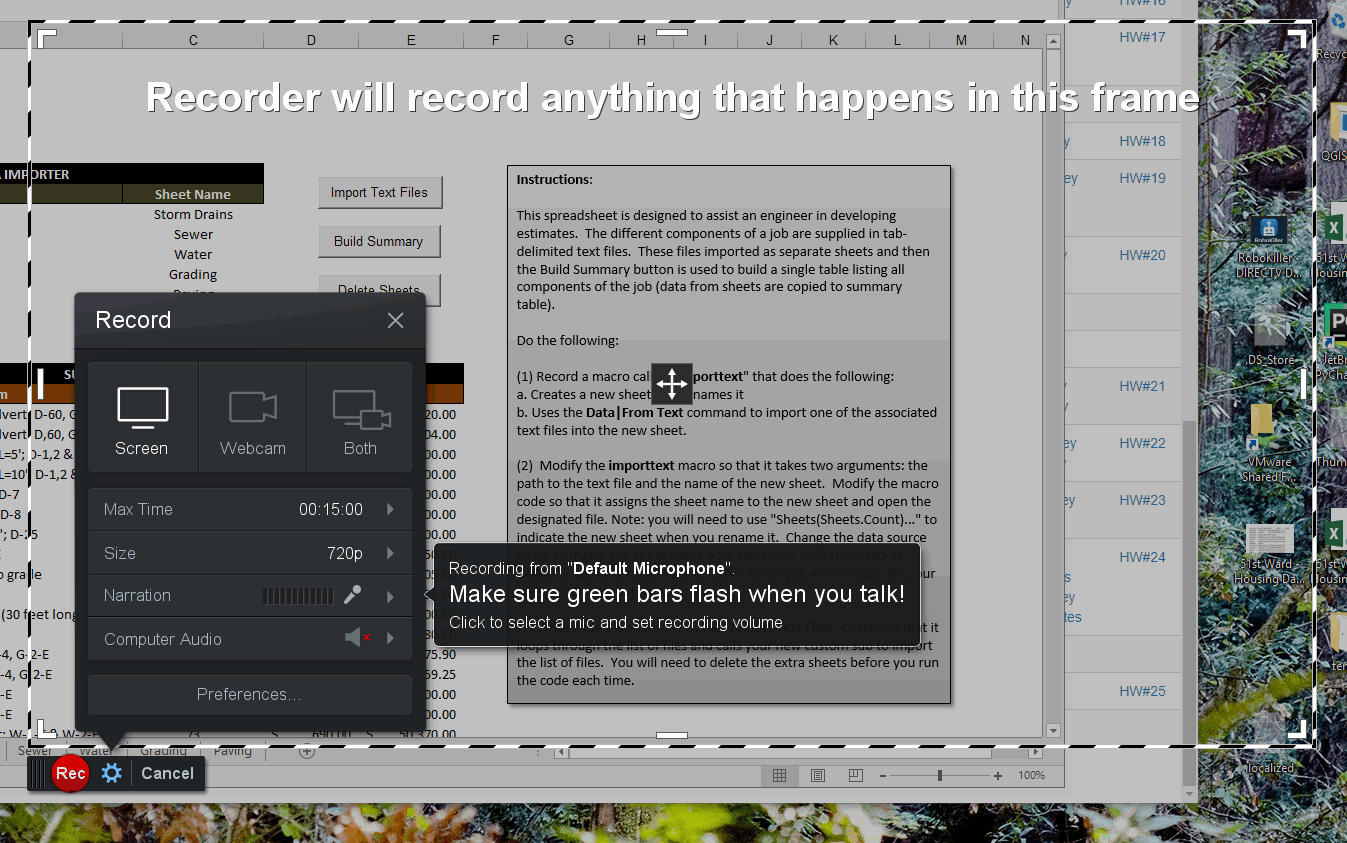
After launching the Screen Recorder app, you should see a new window frame appear that looks like this:
a) Launch the Excel file associated with your term project and resize the Excel window to the size you want to use in your demo. You should make it as big as you need and no bigger because a larger space will result in a larger video at the end.
b) Use the handles on the edges of the Screen Recorder frame to resize the frame to the extents of your Excel window like this:
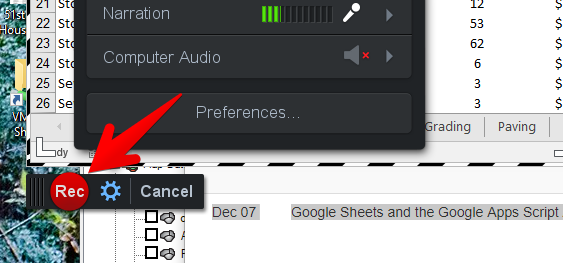
c) Test your microphone to make sure it works. As you talk, you should see the green bars move in the Narration section.
d) Click on the Record button to start recording.
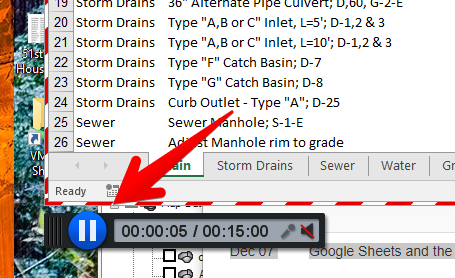
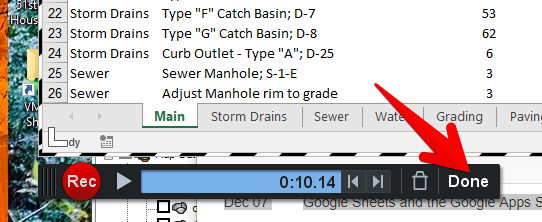
e) At this point, you can record your demo! When you are done, click on the pause button:
f) If you are finished, click the done.png button:
At this point, you can play your video to see if you like it. If not, repeat the previous steps to record a new one. If you like it:
a) Click on the YouTube link to upload to YouTube.
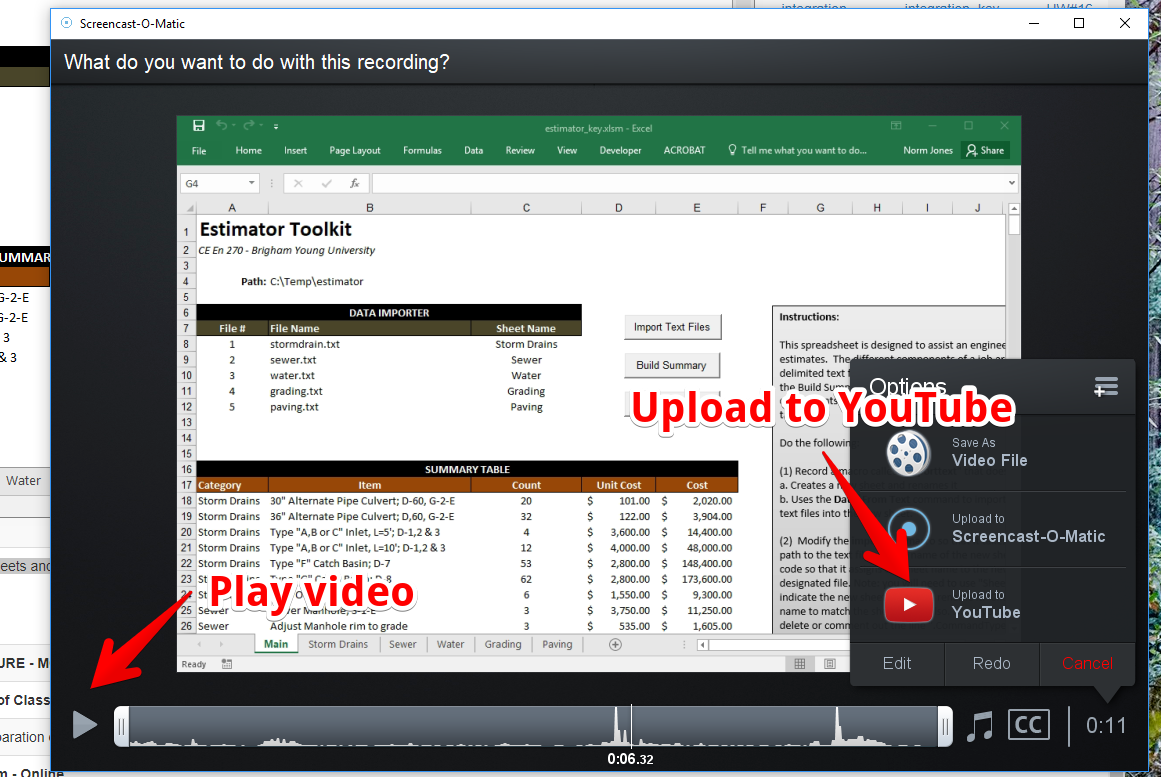
b) Follow the prompts to link the video to your YouTube channel.
When you upload your term project, copy and paste a link to your video in the Title and Description document you upload on Learning Suite.
Done!